Gmail Organization Tutorial
February 2, 2021
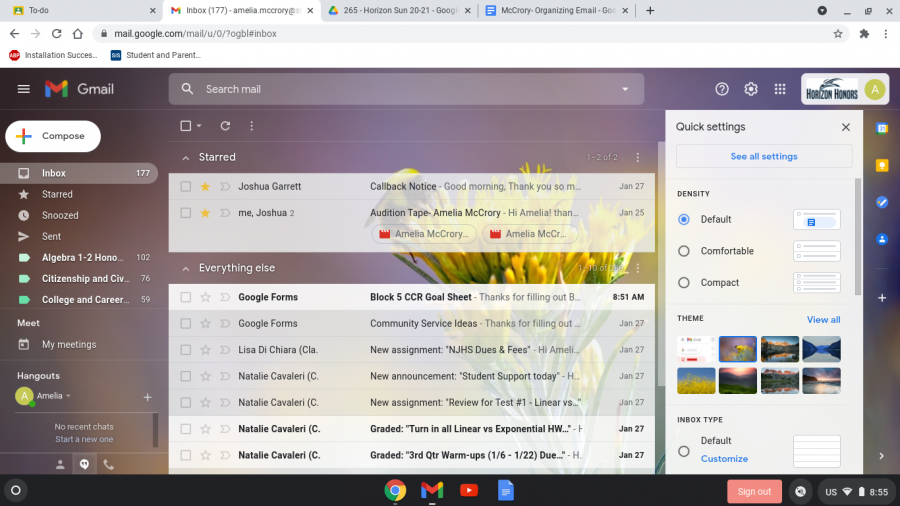
- Select the Settings button to open up a list of Density, Theme, and Inbox Type.Step 1
- Next, choose between the options of Default, Normal, or Compact. If you are more of a minimalist, I would recommend the Default in order to declutter the page. On the other hand, if you prefer seeing a large list, you should choose between Comfortable and Compact.Step 2
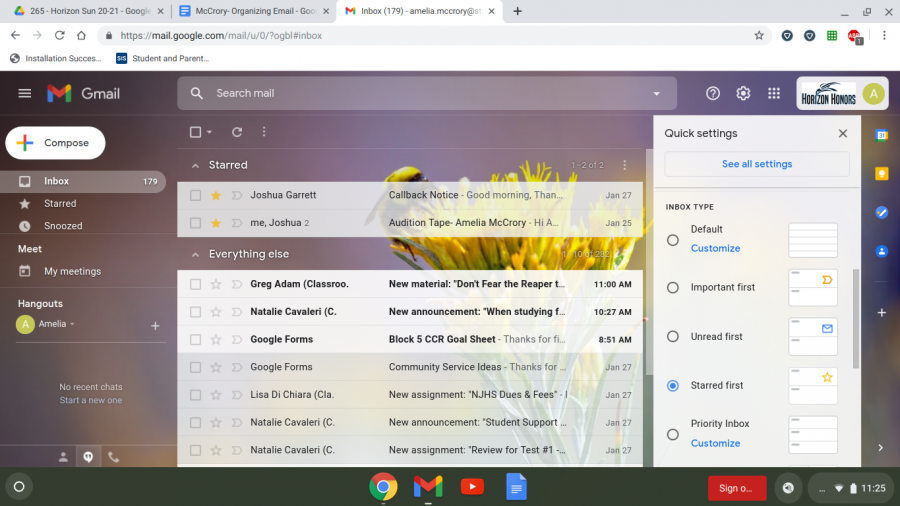
- To continue, you can view the Inbox Type section which will provide you with a list of options of tagged emails. This will enable you to have your starred, saved or unread emails near the top.Step 3
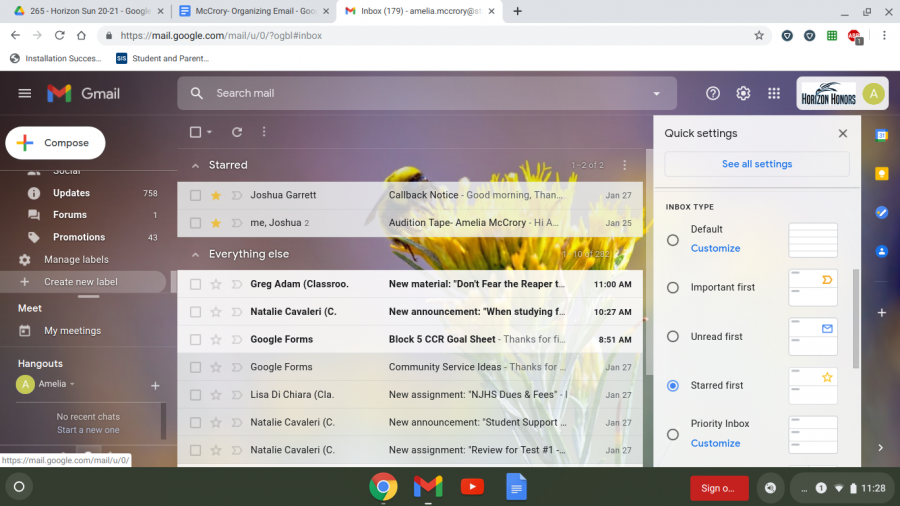
- If you want to section your emails into classes, follow these steps.
- Scroll down to the bottom of the side bar and click on Create New Label.Step 4
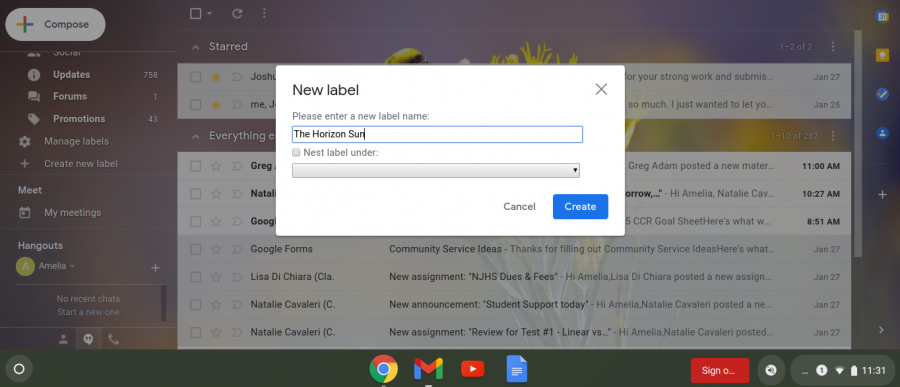
- Enter the name of the subject, and click Create.Step 4
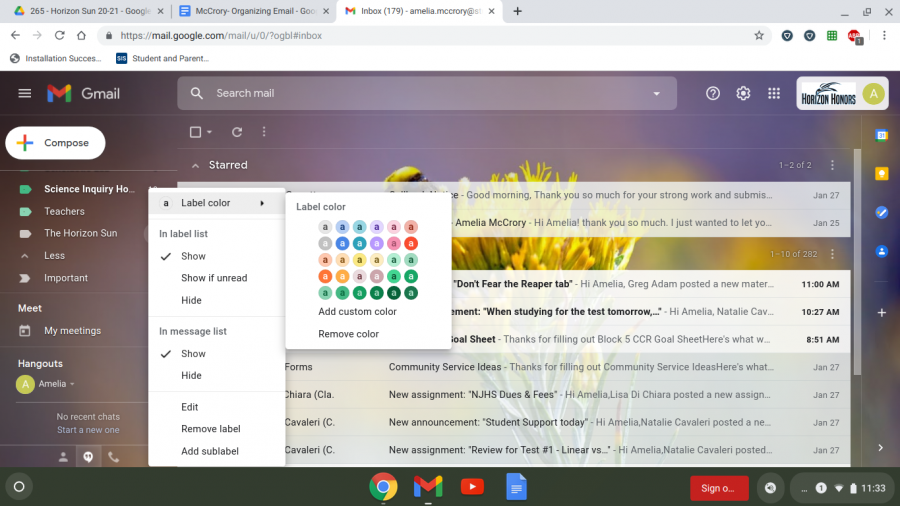
- Now, the Inbox sidebar should include the class subject. To customize the label click on the three dots to the left. This will give you options such as label color, hiding abilities, and more.Step 4
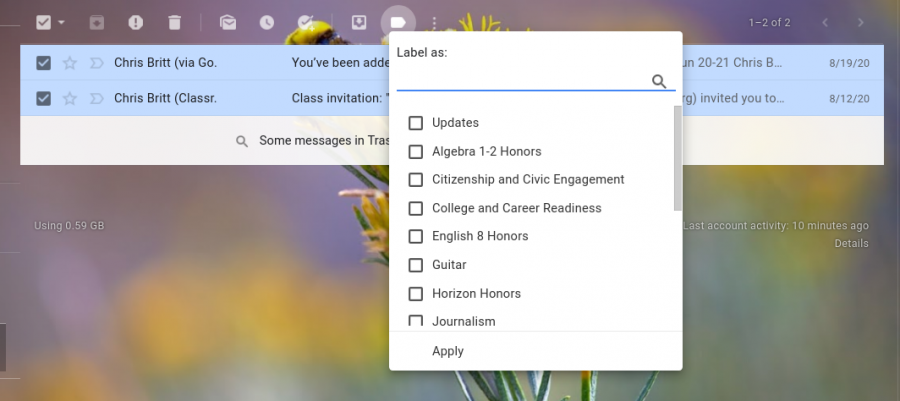
- If wanting to transfer an email to the class folder, follow these steps.
- Select the check box to the left of the email(s).
- Then click the label button on the top of the page.Sub-step 4
- This will bring you to a list of your classes. Click on one, then select Apply, and you are done.
- Scroll down to the bottom of the side bar and click on Create New Label.